
Introduction to Chicken Katsu
What is Chicken Katsu?
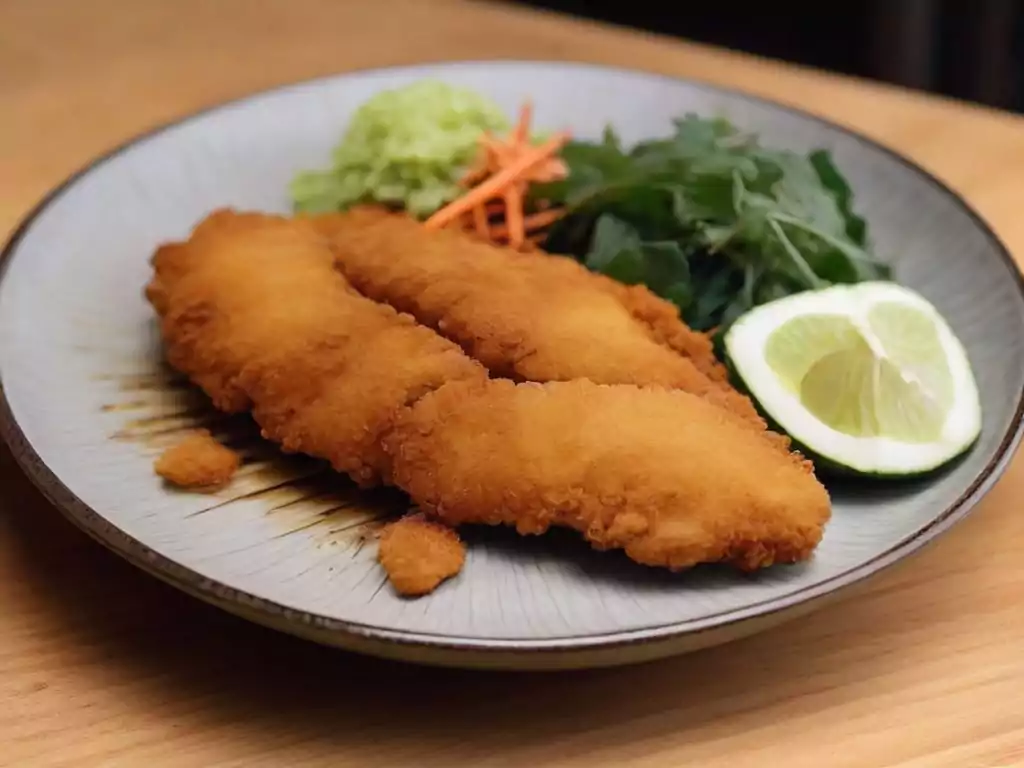
At its core, Chicken Katsu is a testament to the beauty of simplicity in cooking. Imagine tender chicken breasts, seasoned to perfection, coated in a light layer of flour and egg, and then enveloped in a crispy blanket of Panko breadcrumbs. Fried until golden brown, each cutlet is a harmonious blend of textures and flavors, crunchy on the outside and succulent on the inside. It’s a dish that doesn’t just feed the body but also the soul, offering a comforting embrace with every bite.
The Origin and Popularity of Chicken Katsu
Diving into the history books, we find that Chicken Katsu is not just a meal; it’s a narrative of culinary evolution. Originating from Japan, this dish has roots in the adaptation of Western ingredients and cooking techniques during the Meiji era. What started as tonkatsu, a pork cutlet, evolved into Chicken Katsu, catering to a wider audience craving the same crispy delight but preferring chicken as a lighter alternative. Today, its popularity knows no bounds, gracing the menus of Japanese restaurants worldwide and even inspiring home cooks to try their hand at this crispy concoction.
Understanding Katsu: Beyond Just Chicken
While Chicken Katsu holds a special place in our hearts, it’s just the tip of the iceberg. The term ‘katsu’ refers to a broader category of breaded and fried cutlets, including the aforementioned tonkatsu and even fish variants. Each version shares the same foundational technique but brings its unique twist to the table, showcasing the versatility and adaptability of this beloved cooking style. It’s a culinary concept that invites experimentation, encouraging chefs and home cooks alike to explore beyond the boundaries of tradition.
In essence, Chicken Katsu is more than just a dish; it’s a cultural icon, a culinary journey, and a testament to the power of simplicity in cooking. As we continue to explore this delectable dish in the following sections, we’ll delve deeper into the intricacies of its preparation, uncover the secrets to achieving that perfect crunch, and even learn how to preserve its integrity for leftovers. So, stay tuned, as the best is yet to come.
Ingredients and Preparation for Chicken Katsu
Essential Ingredients for the Perfect Chicken Katsu
Creating the perfect Chicken Katsu starts with gathering the right ingredients. At its core, this dish is beautifully simple, requiring only a handful of items:
- Chicken: Choose four skinless, boneless chicken breast halves for a tender bite.
- Seasonings: A simple sprinkle of salt and pepper enhances the natural flavors.
- Flour: All-purpose flour helps to seal in moisture and aids in browning.
- Egg: Acts as a glue for the Panko, adding moisture and richness.
- Panko Breadcrumbs: The star of the show, giving Chicken Katsu its signature crunch.
- Oil: A neutral oil with a high smoke point, like canola or vegetable, is ideal for frying.
These ingredients, though few, come together to create a dish that’s bursting with flavor and texture.

Step-by-Step Guide to Preparing Chicken Katsu
Now that we’ve got our ingredients lined up, let’s dive into the making of Chicken Katsu. The process is straightforward but promises a meal that’ll leave everyone asking for seconds.
- Seasoning the Chicken: Start by seasoning the chicken breasts with salt and pepper. This basic step lays the foundation of flavor.
- Dredging in Flour: Coat each breast lightly in flour. This helps to lock in moisture and creates a surface for the egg to stick to.
- Egg Wash: Dip the floured chicken into a beaten egg. This step is crucial for ensuring the Panko adheres well.
- Panko Coating: Press each egg-dipped breast into the Panko breadcrumbs. Ensure a generous, even coat for that irresistible crunch.
- Frying to Perfection: Heat oil in a large skillet over medium-high heat. Fry each piece until golden brown, about 3-4 minutes per side. The key is to cook them until they’re just done, maintaining juiciness inside and crispiness outside.
Preparing the Chicken
The preparation of the chicken is an art in itself. Before seasoning, you might want to gently pound the breasts to an even thickness. This ensures that they cook evenly, avoiding any dry or undercooked spots.
Breading: The Key to Crispiness
The breading process, involving flour, egg, and Panko, is what sets Chicken Katsu apart. Each layer plays a role in texture and taste, culminating in that perfect, golden crust.
Frying Techniques for a Golden Finish
Frying Chicken Katsu is the final step towards achieving that golden, crispy goodness. The oil should be hot enough to sizzle upon contact but not so hot that it burns the breadcrumbs. A consistent medium-high heat is your best bet for cooking through while achieving that beautiful golden brown color.
In crafting Chicken Katsu, attention to detail transforms simple ingredients into a culinary masterpiece. From seasoning to frying, each step is a building block towards creating a dish that’s as satisfying to make as it is to eat. As we move forward, we’ll explore how to serve this delightful dish and what to pair it with for a complete meal experience. Stay tuned!
Serving and Side Dishes
How to Serve Chicken Katsu
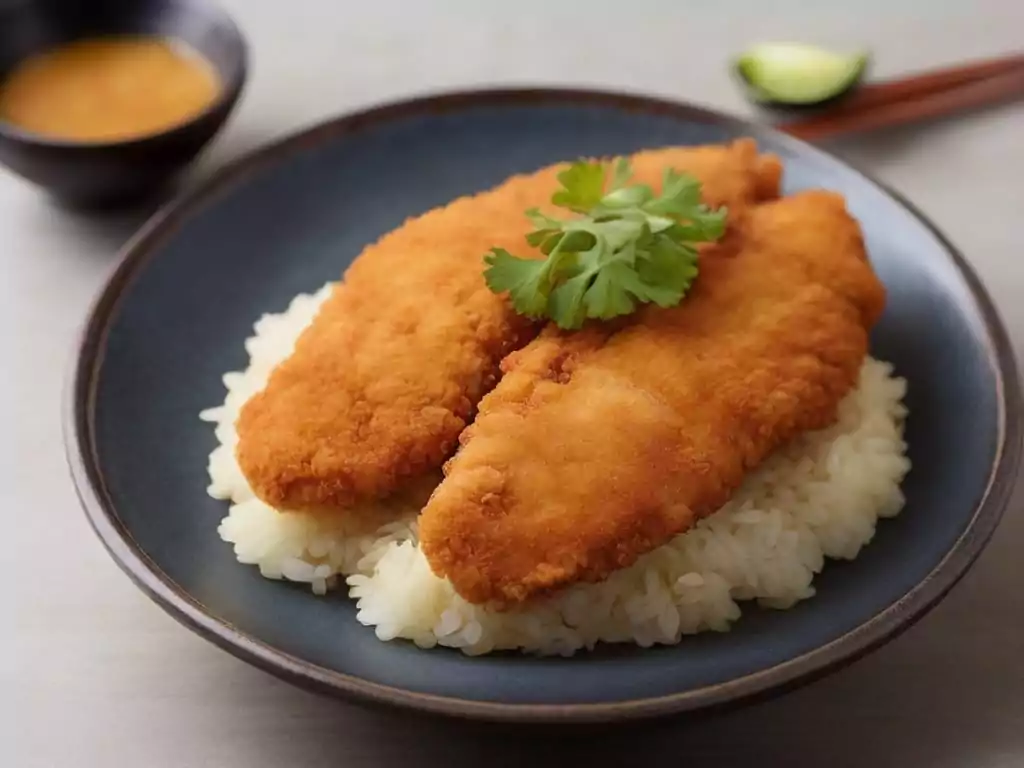
Chicken Katsu, with its golden, crispy exterior and tender interior, is a dish that stands out on any table. But the experience elevates when served thoughtfully. Traditionally, it’s sliced into strips, making it easy to share and enjoy. Drizzle it with tonkatsu sauce, a rich, savory-sweet condiment that complements the crispy chicken beautifully. Serve it over a bed of steamed rice for a classic pairing, or on a Japanese-style cabbage salad for a lighter option. This dish’s versatility makes it a canvas for your culinary creativity.
Perfect Pairings: Side Dishes for Chicken Katsu
The right side dishes can turn your Chicken Katsu meal into a feast for the senses. Here are some suggestions that harmonize with the main dish:
- Kombu Seaweed Salad: This refreshing salad adds a burst of umami and a crisp texture, balancing the richness of the katsu.
- Japanese-Style Cabbage Salad: Thinly sliced cabbage, dressed lightly with vinegar, provides a crunchy, refreshing counterpoint to the fried chicken.
- Miso Soup: Start the meal with a warm bowl of miso soup. Its soothing flavors prepare the palate for the main dish.
- Steamed Rice: A staple in Japanese cuisine, fluffy steamed rice complements the savory flavors of Chicken Katsu.
- Pickled Vegetables: A side of pickled radish or cucumbers offers a tangy contrast that cuts through the dish’s richness.
Traditional Japanese Sides
Exploring traditional Japanese sides not only enhances the Chicken Katsu experience but also introduces diners to a broader spectrum of Japanese flavors. Tsukemono (pickled vegetables) and a small serving of edamame provide a delightful variety of textures and tastes.
Modern Twists on Classic Sides
For those looking to modernize their Chicken Katsu meal, consider incorporating fusion elements. A side of sweet potato fries with a wasabi mayo dip or a quinoa salad with ginger dressing can add an exciting, contemporary twist to the traditional meal.
Serving Chicken Katsu is about creating a balanced meal that delights the senses. The combination of crispy chicken, savory sauces, and complementary sides results in a harmonious dining experience. As we move forward, we’ll delve into the best practices for storing and reheating leftovers, ensuring that every bite of Chicken Katsu remains as satisfying as the first. Stay tuned for practical tips that will help you enjoy this delicious dish to its fullest.
Storage and Reheating Tips
Properly storing and reheating Chicken Katsu can make all the difference between enjoying a meal that tastes just as good as when it was first made and settling for a soggy disappointment. Here’s how to keep that Chicken Katsu crispy and delicious even after it’s been in the fridge.
Preserving the Crunch: How to Store Chicken Katsu
After savoring the crispy goodness of Chicken Katsu, you might find yourself with leftovers. Fear not, as storing this dish for later consumption is a breeze, provided you follow a few simple steps:
- Cooling Down: Allow your Chicken Katsu to cool to room temperature before storing. This prevents moisture build-up, which can make the breadcrumbs soggy.
- Refrigeration: Place the cooled Chicken Katsu in an airtight container. To maintain its crispiness, you can line the container with paper towels to absorb any excess moisture.
- Freezing for Longevity: If you’re planning to keep Chicken Katsu for more than a few days, freezing is a viable option. Wrap each piece individually in plastic wrap and then place them in a freezer bag. Frozen Chicken Katsu can last for up to a month without losing much of its texture or flavor.
Reheating Chicken Katsu Without Losing Texture
Reheating Chicken Katsu so it remains crispy is crucial. The oven is your best friend here, as it helps to evenly distribute heat without making the breading soggy:
- Oven Method: Preheat your oven to 375°F (190°C). Place the Chicken Katsu on a wire rack over a baking sheet. This setup allows air to circulate around the chicken, ensuring it heats evenly and maintains its crispiness. Heat for about 10-15 minutes, or until it’s thoroughly warmed and the exterior is crisp.
- Microwave with Caution: While not the best method for preserving crispiness, you can use the microwave in a pinch. To avoid sogginess, set the microwave to a lower power setting and heat in short intervals, checking the texture between each.
For more detailed guidance on food storage and safety practices, consider visiting Food Safety Guidelines, which provides comprehensive advice on keeping your meals safe and delicious after storage.
Incorporating these storage and reheating tips ensures that your Chicken Katsu remains a delightful treat even days after it was made. With the right techniques, you can enjoy this crispy, savory dish with its flavor and texture nearly as perfect as when freshly cooked. As we move into the next section, we’ll tackle some of the most common questions about Chicken Katsu, providing you with even more insights into enjoying this beloved dish.
Frequently Asked Questions About Chicken Katsu
In this section, we’ll dive into some of the most commonly asked questions about Chicken Katsu. Whether you’re a seasoned chef or a curious novice, these insights will help you master the art of this beloved dish.
Can Chicken Katsu be Made Gluten-Free?
Absolutely! Making Chicken Katsu gluten-free is simpler than you might think. Substitute the all-purpose flour with a gluten-free alternative, such as rice flour or a gluten-free blend. For the breadcrumbs, opt for gluten-free Panko or crushed gluten-free cereal for that perfect crunch. These simple swaps allow everyone to enjoy Chicken Katsu without compromise.
What are the Best Oils for Frying Chicken Katsu?
The key to frying Chicken Katsu is using an oil with a high smoke point to ensure it cooks evenly without absorbing too much oil. Canola, vegetable, and peanut oils are excellent choices. They heat well, maintain a neutral flavor, and won’t overpower the delicate taste of the chicken and Panko.
How to Achieve the Perfect Crunch in Chicken Katsu?
The secret to that irresistible crunch lies in the Panko breadcrumbs. Unlike regular breadcrumbs, Panko is lighter and flakier, resulting in a crispier coating. For the best results, make sure your oil is hot enough (around 350°F or 175°C) before frying, and don’t overcrowd the pan. This ensures each piece cooks evenly, achieving that golden, crunchy exterior.
For those looking to expand their culinary skills or explore more about Japanese cuisine, websites like Japanese Cooking 101 offer a wealth of recipes and tips that cater to both traditional and modern tastes.
By addressing these FAQs, we hope to have provided you with valuable insights into creating the perfect Chicken Katsu. With a little practice and the right techniques, you’ll be able to enjoy this dish anytime, tailoring it to your preferences and dietary needs. Stay tuned for our final thoughts on Chicken Katsu, where we’ll wrap up our culinary journey and offer some encouragement to experiment with this versatile and delicious dish.
Advanced Tips and Tricks for the Perfect Chicken Katsu
Elevating your Chicken Katsu from good to great involves a sprinkle of creativity and a dash of culinary finesse. In this section, we’ll dive into some advanced tips and tricks that can help you enhance the flavor, achieve the perfect crunch, and even cater to dietary preferences.
Marinades and Seasonings for Enhanced Flavor
The journey to a flavorful Chicken Katsu begins well before the breading stage. Marinades and seasonings play a crucial role in infusing the chicken with depth and character:
- Soy Sauce and Mirin: A simple marinade of soy sauce and mirin (a sweet Japanese rice wine) can add a subtle umami and sweetness to the chicken, elevating its flavor profile.
- Garlic and Ginger: For a hint of spice and warmth, marinate the chicken with minced garlic and ginger. These aromatics introduce a layer of complexity that complements the chicken’s natural flavors.
- Seasoning Variations: Don’t shy away from experimenting with different seasonings. A touch of curry powder or paprika can add an interesting twist to your Chicken Katsu.
Panko vs. Regular Bread Crumbs: What Makes the Difference?
Panko breadcrumbs are the soul of Chicken Katsu, giving it that signature light and airy crunch. Here’s why Panko stands out from regular breadcrumbs:
- Texture: Panko crumbs are larger and flakier than their regular counterparts, which means they absorb less oil and stay crispier for longer.
- Lightness: Thanks to their unique processing, Panko breadcrumbs create a coating that’s remarkably crunchy yet light, preventing the chicken from feeling heavy or overly breaded.
The Art of Deep-Frying: Temperature and Time
Achieving that golden, crispy exterior without overcooking the chicken inside is the hallmark of a perfect Chicken Katsu. Here are some deep-frying tips to help you nail it every time:
- Oil Temperature: Maintain the oil at a steady 350°F (175°C). Use a cooking thermometer to monitor the temperature. Too hot, and the breadcrumbs will burn before the chicken cooks through; too cool, and the chicken will absorb excess oil, becoming greasy.
- Batch Cooking: Avoid overcrowding the pan. Cook in batches if necessary. This ensures the oil temperature remains constant, leading to a more even fry.
- Resting: Let the cooked Chicken Katsu rest on a wire rack for a few minutes before serving. This allows excess oil to drain off, keeping the coating crisp.
Mastering these advanced techniques will not only boost your Chicken Katsu game but also open up a world of possibilities for personalizing this beloved dish. Whether it’s through innovative marinades, the perfect breading, or the artful mastery of frying, the path to Chicken Katsu perfection is filled with opportunities for creativity. As we wrap up our culinary journey, let’s reflect on the essence of Chicken Katsu and how it captures the heart of Japanese cooking with its simplicity, elegance, and irresistible crunch.