
There’s nothing quite like the rich, velvety texture of homemade ice cream, especially when it’s bursting with the natural sweetness of cherries and the warm aroma of vanilla. This Cherry Vanilla Ice Cream is a perfect balance of fruity freshness and creamy indulgence. It’s the kind of treat that feels nostalgic yet sophisticated, making it ideal for summer days, special occasions, or simply satisfying an ice cream craving at home.
Why You’ll Love This Cherry Vanilla Ice Cream
I love making ice cream from scratch because it allows me to control the quality of ingredients and experiment with flavors. This Cherry Vanilla Ice Cream brings together the tart, juicy essence of cherries with the deep, comforting taste of real vanilla. The result? A perfectly creamy scoop that melts in your mouth, offering a delightful contrast of flavors.
The best part is that it’s surprisingly easy to make! With just a few simple ingredients, a bit of patience, and an ice cream maker, you can whip up this luscious dessert right in your kitchen. Plus, there are no artificial flavors or preservatives—just pure, homemade goodness.
A Classic Flavor with a Fruity Twist
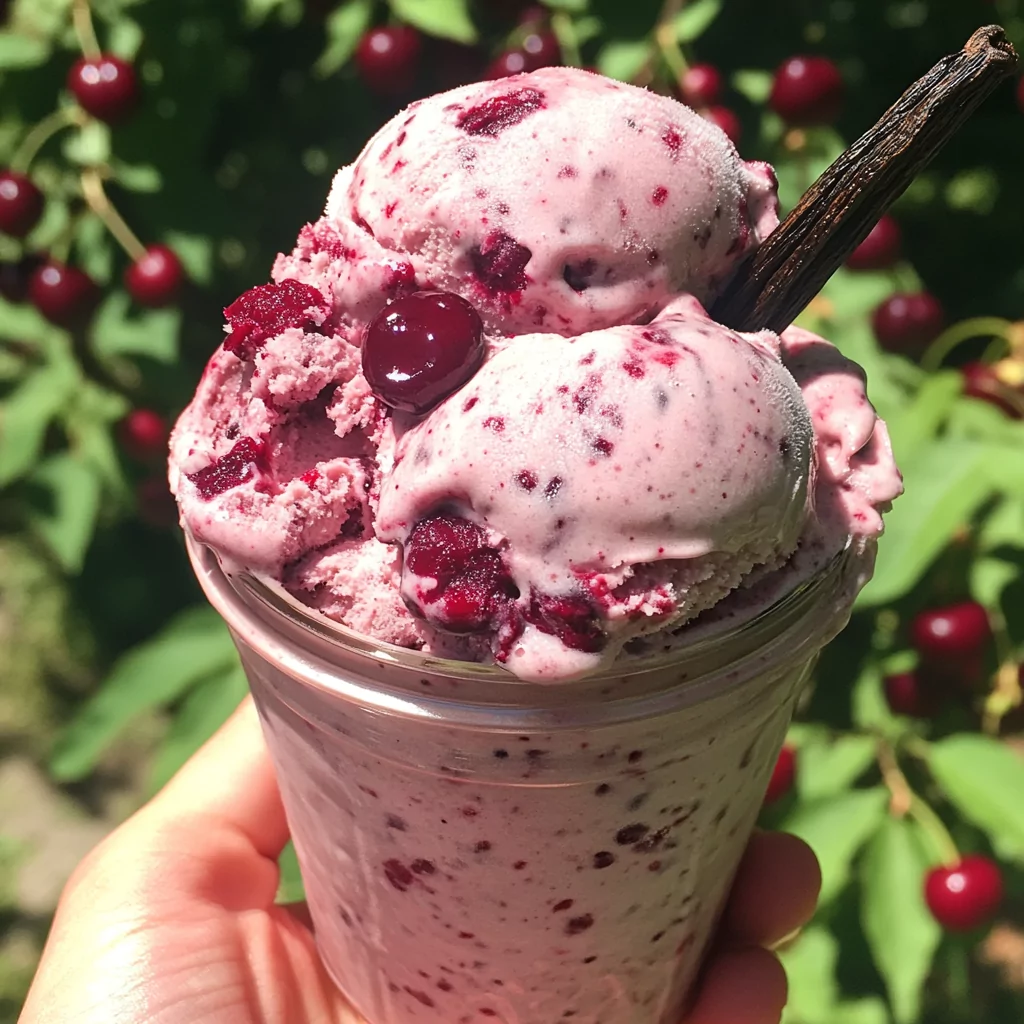
Vanilla ice cream is a timeless favorite, but when you swirl in real cherry puree, it takes the experience to a whole new level. The cherries add natural sweetness and a beautiful pink hue, making every bite both visually stunning and incredibly delicious. Whether you’re serving it in a bowl, a cone, or even using it to top a warm dessert, this Cherry Vanilla Ice Cream is guaranteed to impress
Ingredients for Cherry Vanilla Ice Cream
To create this creamy, fruity delight, you’ll need a few high-quality ingredients that come together to make the perfect homemade ice cream.
- Cherries – Fresh or frozen cherries work well in this recipe. They add a natural sweetness and beautiful color to the ice cream. If using frozen cherries, let them thaw slightly before cooking.
- Granulated Sugar – Helps enhance the natural sweetness of the cherries while ensuring a smooth texture.
- Heavy Cream – Provides richness and a velvety consistency.
- Whole Milk – Balances the creaminess, ensuring the ice cream isn’t too heavy.
- Vanilla Bean or Vanilla Extract – A vanilla bean delivers the best flavor, but vanilla extract is a great alternative. It adds warmth and depth to complement the cherries.
- Pinch of Salt – Just a small amount helps bring out the flavors and balance the sweetness.
How to Make Cherry Vanilla Ice Cream
Making homemade ice cream might seem complicated, but this recipe is simple and rewarding. Follow these steps to create a creamy, flavorful batch of Cherry Vanilla Ice Cream.
Step 1: Cook the Cherries
In a saucepan over medium heat, combine the pitted cherries and sugar. Stir occasionally and let them cook for about 5-7 minutes, or until the cherries release their juices and the sugar dissolves. This process enhances the cherry flavor and creates a smooth puree.
Step 2: Blend the Cherries
Once the cherry mixture has cooled slightly, transfer it to a blender or food processor. Blend until smooth to create a rich cherry puree. If you prefer small fruit pieces in your ice cream, you can pulse the mixture instead of blending it completely.
Step 3: Heat the Cream and Milk
In a separate saucepan, heat the heavy cream, whole milk, vanilla bean (with seeds scraped), and salt over medium heat. Stir occasionally and heat until the mixture is warm but not boiling. This step allows the flavors to infuse, creating a rich vanilla base.
Step 4: Strain the Vanilla Mixture
If using a vanilla bean, remove it from the mixture. Strain the cream mixture to ensure a smooth texture, removing any solids.
Step 5: Combine the Cherry and Cream Mixture
Gradually whisk the cherry puree into the warm cream mixture until fully incorporated. This step ensures an even blend of flavors throughout the ice cream.
Step 6: Chill the Ice Cream Base
Refrigerate the mixture until it is thoroughly chilled. Ideally, let it sit overnight to allow the flavors to meld and develop. A well-chilled base results in smoother ice cream with better texture.
Step 7: Churn the Ice Cream
Once the mixture is cold, pour it into an ice cream maker and churn according to the manufacturer’s instructions. The ice cream will start to thicken and develop a creamy texture as it churns. This process usually takes 20-30 minutes depending on your machine.
Step 8: Freeze Until Firm
Transfer the freshly churned ice cream into a freezer-safe container. Cover it tightly and freeze for at least 2-4 hours, or until firm. This allows the ice cream to set properly and achieve the perfect scoopable consistency.
Step 9: Serve and Enjoy
Scoop your homemade Cherry Vanilla Ice Cream into bowls or cones and enjoy! The combination of sweet cherries and creamy vanilla makes this dessert irresistible.
How Long to Churn and Freeze Cherry Vanilla Ice Cream
The key to achieving a perfectly creamy and smooth Cherry Vanilla Ice Cream lies in the churning and freezing times. Here’s what you need to know to get the best texture:
- Churning Time: Most ice cream makers take between 20 to 30 minutes to churn the mixture properly. The goal is to achieve a thick, soft-serve consistency before transferring it to the freezer. If it’s too runny, let it churn for a few more minutes, but avoid over-churning as this can result in icy texture.
- Freezing Time: Once churned, transfer the ice cream to a freezer-safe container and let it freeze for at least 2-4 hours to firm up. For best results, let it sit overnight to develop the ideal scoopable texture.
How to Store Cherry Vanilla Ice Cream
If you have leftovers (which is rare in my house!), proper storage will keep your ice cream fresh and creamy for as long as possible.
Refrigerator Storage Before Churning
- If you’re prepping the ice cream base in advance, you can store the chilled mixture in the refrigerator for up to 24 hours before churning. This helps the flavors meld together beautifully.
Freezer Storage After Churning
- Airtight Container: Store the ice cream in an airtight container to prevent freezer burn.
- Plastic Wrap Trick: Pressing a layer of plastic wrap directly onto the surface before sealing helps minimize ice crystal formation.
- Storage Duration: Homemade ice cream is best enjoyed within 1-2 weeks. Since it doesn’t contain preservatives, it may develop ice crystals if stored too long.
Tips for the Best Cherry Vanilla Ice Cream
Want to make sure your homemade ice cream turns out perfectly every time? Keep these pro tips in mind!
✔️ Use Fresh or High-Quality Frozen Cherries – Fresh cherries give the best flavor, but frozen ones work great too. If using frozen, let them thaw slightly before cooking.
✔️ Chill the Ice Cream Base Overnight – This allows the flavors to develop and results in a smoother texture after churning.
✔️ Don’t Skip the Pinch of Salt – Salt enhances the overall flavor, balancing the sweetness and richness of the ice cream.
✔️ Add Texture with Chopped Cherries – For a fruitier texture, fold in some finely chopped cherries after churning.
✔️ Avoid Over-Churning – Once the ice cream reaches a soft-serve consistency, stop churning. Over-churning can make the texture too firm and icy.
✔️ Let It Soften Before Scooping – If your ice cream is too hard straight from the freezer, let it sit at room temperature for 5 minutes before scooping.
Fun Serving Ideas for Cherry Vanilla Ice Cream
This ice cream is already delicious on its own, but why not take it up a notch with creative serving ideas?
🍪 Ice Cream Sandwiches: Scoop it between two chocolate chip cookies for a delightful summer treat.
🍰 Pie à la Mode: Serve it alongside a slice of warm apple or cherry pie for the ultimate indulgence.
🍫 Chocolate Drizzle: A light drizzle of dark chocolate adds a decadent touch.
🥞 On Pancakes or Waffles: A scoop of Cherry Vanilla Ice Cream on top of warm pancakes makes breakfast extra special.

Homemade Cherry Vanilla Ice Cream – A Creamy and Fruity Delight
- Total Time: 6h20
- Yield: 6 servings 1x
Description
This Cherry Vanilla Ice Cream is a creamy, homemade treat bursting with the rich flavor of fresh cherries and warm vanilla. Made with simple ingredients, it’s the perfect dessert for summer days or anytime you crave a refreshing, fruity ice cream. Whether served in a bowl, cone, or alongside your favorite desserts, this recipe is sure to be a hit!
Ingredients
- 2 cups pitted cherries, fresh or frozen 🍒
- 1 cup granulated sugar 🍚
- 2 cups heavy cream 🥛
- 1 cup whole milk 🥛
- 1 vanilla bean, split and seeds scraped (or 1 tbsp vanilla extract) 🌰
- Pinch of salt 🧂
Instructions
- Cook the cherries – In a saucepan over medium heat, combine the cherries and sugar. Stir occasionally and cook until the cherries release their juices and the sugar dissolves (about 5-7 minutes).
- Blend the cherries – Let the mixture cool slightly, then puree in a blender or food processor until smooth.
- Heat the dairy – In a separate saucepan, heat the heavy cream, whole milk, vanilla bean (or extract), and salt until it reaches a gentle simmer. Remove from heat.
- Strain the mixture – Remove the vanilla bean and strain the cream mixture for a smooth texture.
- Combine flavors – Gradually whisk the cherry puree into the cream mixture until fully blended.
- Chill the base – Cover and refrigerate until fully chilled (preferably overnight).
- Churn the ice cream – Pour the mixture into an ice cream maker and churn according to the manufacturer’s instructions (about 20-30 minutes).
- Freeze until firm – Transfer to a freezer-safe container and freeze for at least 2-4 hours until firm.
- Serve & enjoy! – Scoop into bowls or cones and enjoy your homemade Cherry Vanilla Ice Cream!
Notes
- If using frozen cherries, let them thaw slightly before cooking.
- For extra texture, fold in chopped cherries, chocolate shavings, or nuts after churning.
- No ice cream maker? Use a no-churn method by whipping 2 cups heavy cream and folding it into the cherry mixture before freezing.
- Store in an airtight container in the freezer for up to 2 weeks.
- Prep Time: 10 minutes
- Cook Time: 10 minutes
Frequently Asked Questions
1. Can I Make Cherry Vanilla Ice Cream Without an Ice Cream Maker?
Yes! If you don’t have an ice cream maker, you can still enjoy homemade Cherry Vanilla Ice Cream with a no-churn method. Follow these steps:
- After preparing the cherry and cream mixture, let it chill in the refrigerator completely.
- Whip 2 cups of heavy cream until soft peaks form.
- Fold in the cherry mixture gently until well combined.
- Pour into a freezer-safe container, cover tightly, and freeze for 4-6 hours, stirring every 30 minutes in the first two hours to prevent ice crystals.
The texture won’t be as airy as churned ice cream, but it will still be rich and delicious!
2. Can I Use Frozen Cherries Instead of Fresh Cherries?
Absolutely! Frozen cherries work just as well as fresh ones. If using frozen cherries:
- Let them thaw slightly before cooking.
- Since frozen cherries may release extra moisture, you might need to cook them for an additional 2-3 minutes to thicken the mixture properly.
Frozen cherries ensure you can enjoy Cherry Vanilla Ice Cream year-round, even when fresh cherries aren’t in season!
3. How Can I Make This Ice Cream More Creamy?
For an ultra-creamy texture, try these tips:
- Use high-fat dairy – Stick to heavy cream and whole milk for the richest texture. Avoid using low-fat or skim milk, as they can make the ice cream icy.
- Chill the mixture overnight – A well-chilled base creates a smoother consistency when churned.
- Avoid over-churning – Stop the machine once the ice cream reaches a soft-serve consistency. Over-churning can lead to a dense, icy texture.
4. Can I Add Mix-Ins Like Chocolate or Nuts?
Definitely! If you want to customize your Cherry Vanilla Ice Cream, try these mix-in ideas:
- Dark Chocolate Chips or Shavings – A touch of chocolate pairs beautifully with cherries.
- Toasted Almonds or Pecans – Adds a delightful crunch.
- Swirl of Cherry Compote or Jam – Enhances the cherry flavor with even more fruitiness