
Oh, let me tell you about one of the most exciting DIY projects I’ve ever tried—Bubble Gum Slime! If you love crafting and getting your hands a little messy, this recipe is going to be your new favorite. It’s stretchy, bouncy, and smells just like real bubble gum. Plus, it’s completely safe and non-toxic, making it perfect for kids and adults alike.
I still remember the first time I made this slime with my niece. She was so fascinated by the gooey texture and the sweet scent that she couldn’t stop playing with it. We spent hours stretching, squishing, and even pretending to blow slime bubbles! Ever since then, it has become a go-to activity whenever she visits.
What I love most about this slime is how easy it is to customize. Want a brighter color? Add a little more food coloring! Prefer a softer texture? Adjust the ingredients slightly! The best part? It doesn’t stick to your hands like other slimes, making cleanup a breeze.
What’s in DIY Bubble Gum Slime?
White School Glue: The base of our slime, providing that perfect stretchy consistency. Make sure to use PVA glue for the best results.
Bubble Gum Scented Oil: The secret ingredient that gives this slime its irresistible scent! You can find it in craft stores or online.
Pink Food Coloring: What’s bubble gum without that classic pink color? A few drops will do the trick.
Baking Soda: Helps to activate and thicken the slime, giving it the perfect texture.
Contact Lens Solution (with Boric Acid): This is what brings everything together and makes the slime stretchy without being sticky.
Cornstarch: Optional, but it helps make the slime extra fluffy and smooth.
Ingredients
-
1 cup white school glue (PVA glue)
-
½ teaspoon baking soda
-
1 tablespoon bubble gum scented oil
-
2-3 drops pink food coloring
-
1 tablespoon cornstarch (optional, for extra fluffiness)
-
1-2 tablespoons contact lens solution (must contain boric acid)
How to Make DIY Bubble Gum Slime
-
Prepare Your Mixing Bowl: Pour the white school glue into a large mixing bowl. This will be the base of your slime.
-
Add Baking Soda: Sprinkle the baking soda over the glue and stir well to combine. This helps thicken the slime and gives it a firmer texture.
-
Add Bubble Gum Scent and Color: Pour in the bubble gum scented oil and add a few drops of pink food coloring. Stir until the color is evenly mixed. You can adjust the color by adding more drops if needed.
-
Incorporate Cornstarch (Optional): If you want a softer, fluffier slime, mix in the cornstarch at this stage. Stir until fully combined.
-
Activate the Slime: Slowly add 1 tablespoon of contact lens solution while stirring. The mixture will start to thicken and pull away from the sides of the bowl. Add a little more solution if needed, but go slowly—too much can make the slime too stiff.
-
Knead the Slime: Once the slime starts forming, take it out of the bowl and knead it with your hands for about 2-3 minutes. If it’s too sticky, add a few more drops of contact lens solution and continue kneading.
-
Play and Store: Your bubble gum slime is now ready to be stretched, squished, and played with! Store it in an airtight container to keep it fresh for longer.
Sweet Tips and Fun Variations
-
Want a glossy finish? Add a few drops of baby oil to make the slime extra smooth.
-
Prefer a fluffier texture? Mix in shaving cream for a light, airy feel.
-
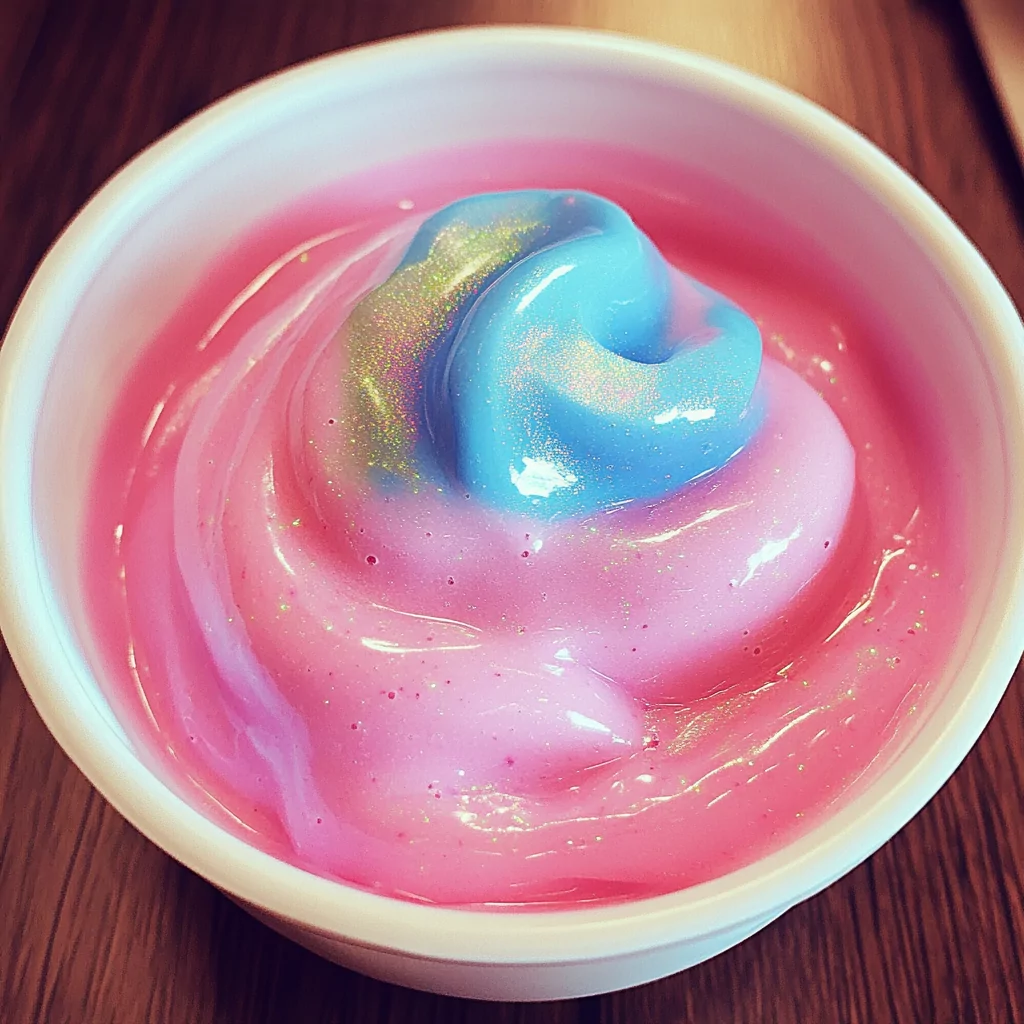
Try different colors! Bubble gum isn’t always pink—experiment with blue, purple, or even swirled colors for a fun twist.
This DIY bubble gum slime is so much fun to make and play with! Try it out, and let me know how yours turns out!
How to Make DIY Bubble Gum Slime (Detailed Instructions)
-
Prepare the Glue Base: Start by pouring 1 cup of white school glue into a large mixing bowl. Use a spoon or spatula to spread it evenly in the bowl. The glue will act as the main binding ingredient, giving the slime its stretchy texture.
-
Add Baking Soda for Thickness: Sprinkle ½ teaspoon of baking soda over the glue. This helps control the slime’s consistency and prevents it from becoming too runny. Stir well until the baking soda is fully dissolved into the glue.
-
Incorporate the Bubble Gum Scent: Add 1 tablespoon of bubble gum scented oil. Stir the mixture thoroughly to distribute the scent evenly. This step is what makes the slime smell just like real bubble gum!
-
Mix in the Pink Food Coloring: To achieve that signature bubble gum color, add 2-3 drops of pink food coloring. Stir well until the color is evenly blended. If you want a deeper shade, add an extra drop, but be careful not to overdo it.
-
Optional – Add Cornstarch for Softness: If you want your slime to have a smoother and softer texture, mix in 1 tablespoon of cornstarch. This step is optional, but it makes the slime extra fluffy and fun to play with. Stir well until fully combined.
-
Activate the Slime with Contact Lens Solution: Slowly add 1 tablespoon of contact lens solution containing boric acid. Stir constantly as you pour. You’ll notice the slime starting to thicken and pull away from the sides of the bowl. If it still feels too sticky, add an extra tablespoon of contact lens solution, but do so gradually.
-
Knead the Slime Until Perfect: Once the slime starts coming together, take it out of the bowl and knead it with your hands for about 2-3 minutes. This step is crucial for developing the perfect stretchy texture. If it’s still too sticky, add a few drops of contact lens solution and continue kneading.
-
Test the Stretch and Adjust if Needed: Stretch the slime gently to check its consistency. If it breaks too easily, add a tiny bit more glue. If it’s too stiff, add a drop of baby oil to soften it. Keep adjusting until you get the perfect stretchy, bubble-like slime.
-
Play and Have Fun: Your bubble gum slime is now ready to be stretched, twisted, and squished! The fun part is experimenting with different ways to play with it. Try pulling it slowly to create long strands, rolling it into a ball, or even attempting to form a slime bubble by gently blowing air into it with a straw.
-
Store Properly for Longevity: Place the slime in an airtight container to prevent it from drying out. If stored correctly, it can last for weeks! If it becomes too firm over time, knead in a tiny amount of lotion to restore its softness.
Sweet Tips and Fun Variations
-
Want a glossy finish? Add a drop of baby oil to give the slime a shiny, smooth texture.
-
Prefer a stretchier slime? Increase the amount of glue slightly for an extra stretchy consistency.
-
Create a swirl effect! Make two different shades of pink slime and twist them together for a fun, bubble gum-inspired look.
-
Try scented glitter! Mix in some fine glitter with the bubble gum scent for a sparkling slime effect.

DIY Bubble Gum Slime
- Total Time: 15 minutes
- Yield: 1 batch of slime 1x
Description
This DIY Bubble Gum Slime is fun, stretchy, and smells just like real bubble gum! With a few simple ingredients, you can create a soft and fluffy slime that’s perfect for sensory play. Follow this easy recipe to make your own bubble gum-scented slime at home.
Ingredients
-
1 cup white school glue (PVA glue)
-
½ teaspoon baking soda
-
1 tablespoon bubble gum scented oil
-
2–3 drops pink food coloring
-
1 tablespoon cornstarch (optional, for extra fluffiness)
-
1–2 tablespoons contact lens solution (must contain boric acid)
Instructions
-
Pour the white school glue into a mixing bowl.
-
Add the baking soda and stir until fully combined.
-
Mix in the bubble gum scented oil and pink food coloring. Stir well.
-
If using, add the cornstarch for a fluffier texture. Stir until smooth.
-
Slowly add 1 tablespoon of contact lens solution while stirring. The slime will start to thicken.
-
Continue adding a few more drops of contact lens solution until the slime pulls away from the bowl.
-
Knead the slime with your hands for 2-3 minutes until it becomes stretchy and smooth.
-
If the slime is too sticky, add a few more drops of contact lens solution and knead again.
-
Play with your slime and store it in an airtight container when not in use.
Notes
-
For a shinier slime, add a drop of baby oil.
-
If the slime is too stiff, mix in a little lotion to soften it.
-
Store in an airtight container to keep it fresh for longer.
- Prep Time: 5 minutes
- Cook Time: 10 minutes
Frequently Asked Questions
1. Is DIY Bubble Gum Slime safe for kids?
Yes! This slime is made with non-toxic ingredients like school glue and baking soda, making it safe for kids to play with. However, it’s not edible, so always supervise younger children to ensure they don’t put it in their mouths.
2. How do I fix sticky slime?
If your slime is too sticky, try adding a few extra drops of contact lens solution and knead it well. Be careful not to add too much at once, as this can make the slime too stiff. Kneading is key to achieving the perfect texture!
3. How long does bubble gum slime last?
When stored properly in an airtight container, this slime can last for several weeks. If it starts to dry out, knead in a small amount of lotion or a drop of baby oil to restore its softness.
4. Can I use something else instead of contact lens solution?
Contact lens solution with boric acid is the best slime activator. However, you can use liquid starch or a borax solution (1 teaspoon of borax dissolved in 1 cup of warm water) as an alternative. Just add it gradually until you reach the desired consistency.