
I’ll never forget the first time I made aroma stones. It was during a particularly stressful week when my home felt stuffy and uninviting. Moreover, I wanted to avoid chemical air fresheners but still craved a pleasant ambiance. Additionally, I discovered this simple recipe that completely transformed my living space. Furthermore, these little DIY aroma stones have become a staple in my home, and I’m excited to share this recipe with you today. Subsequently, you’ll find this is an incredibly easy project that yields beautiful results.
Why You’ll Love This Recipe
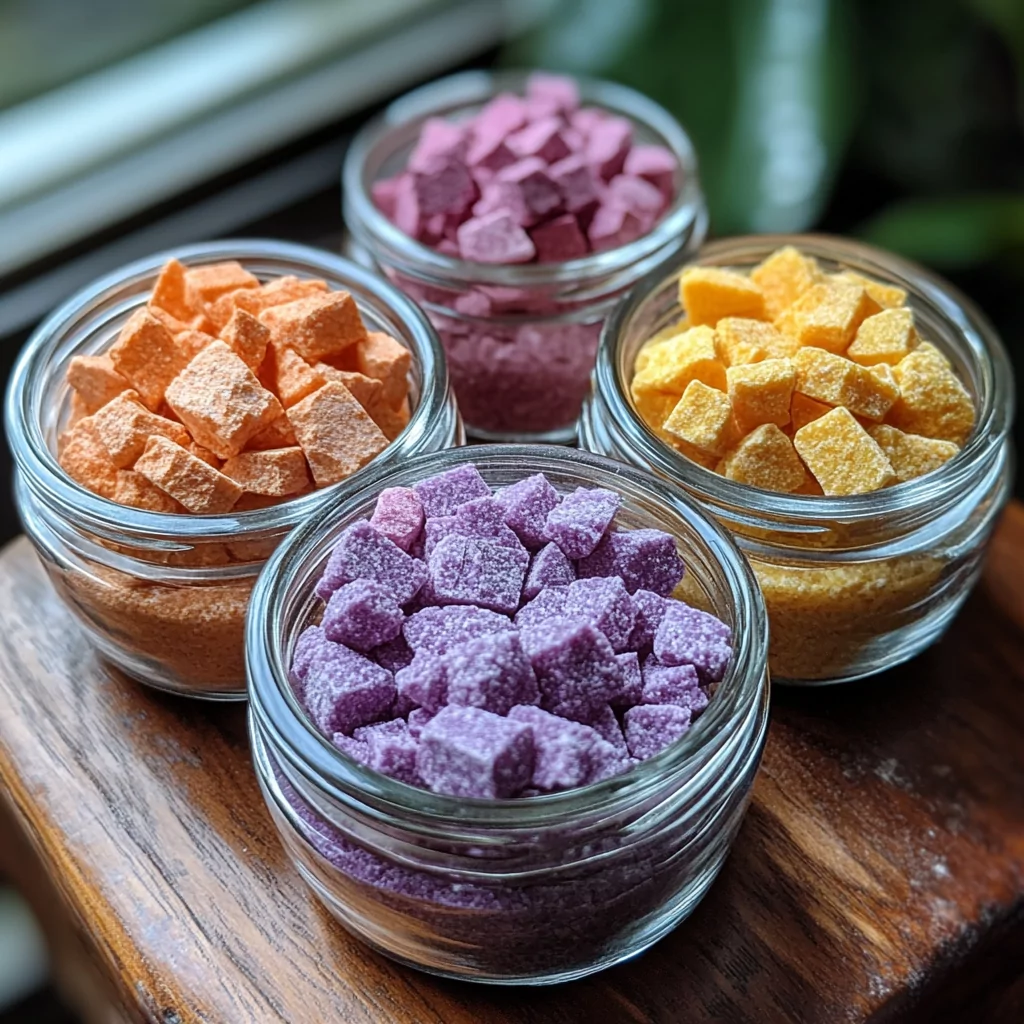
These aroma stones are truly versatile. Initially, you can customize the colors to match your home decor. Then, you can experiment with different essential oil combinations to create unique scents for every room. Consequently, you can create calming lavender stones for your bedroom, energizing citrus ones for your office, or refreshing eucalyptus for your bathroom.
Besides being versatile, these aroma stones are incredibly budget-friendly. In fact, most of the ingredients are probably already in your pantry. Therefore, you can make dozens of stones for a fraction of the cost of commercial air fresheners. Meanwhile, they last for weeks or even months, gradually releasing their gentle fragrance into your space.
Ingredients for DIY Aroma Stones
To make these wonderful aroma stones, you will need:
- 2 cups baking soda
- 1 cup cornstarch
- 1 1/4 cups water
- Food coloring
- Essential oils of your choice
The beauty of this recipe lies in its simplicity. First of all, baking soda and cornstarch create the perfect porous base. Secondly, water binds everything together. Next, food coloring adds visual appeal. Finally, essential oils provide the wonderful aromas that will fill your home.
How to Make Aroma Stones
Step-by-Step Instructions for Making Aroma Stones
First, gather all your materials in one place. Subsequently, find a clean, flat working surface where you can spread out. Meanwhile, prepare some wax paper or silicone molds if you want specific shapes.
To begin, measure 2 cups of baking soda and place it in a large mixing bowl. Next, add 1 cup of cornstarch to the same bowl. Then, gently whisk these dry ingredients together until they’re fully integrated. Furthermore, this mixture creates the perfect base for absorbing and slowly releasing essential oils.
After mixing the dry ingredients, gradually add the 1 1/4 cups of water. Initially, pour about a quarter of the water and stir thoroughly. Then, continue adding small amounts while stirring continuously. Consequently, you’ll notice the mixture starting to thicken. Meanwhile, be patient as the consistency transforms into something similar to wet sand.
Once you have a thick paste, it’s time to add color and scent. First of all, decide on your color scheme. Afterward, add a few drops of food coloring to the mixture. Subsequently, stir thoroughly until the color is evenly distributed. Additionally, you can divide the mixture into smaller portions if you want to create multiple colors.
Now for the most important part – the aroma! Therefore, add 10-15 drops of your chosen essential oils to the mixture. Moreover, you can create custom blends for different effects. For instance, lavender and chamomile work wonderfully for relaxation. Alternatively, citrus oils like orange and lemon create an uplifting atmosphere. Eventually, stir until the oils are fully incorporated.
After everything is mixed, shape your stones. Firstly, take small portions of the mixture in your hands. Then, gently form them into whatever shapes you prefer. Meanwhile, you can also press the mixture into cookie cutters or silicone molds for more defined shapes. Consequently, you’ll have beautiful, uniform stones.
Place your newly formed stones on wax paper or a drying rack. Afterward, let them dry for 24-48 hours, depending on their size and the humidity in your home. Eventually, they’ll harden completely and be ready to use. Finally, once dry, they should feel solid to the touch with a slightly powdery texture.
Quick and Easy
One of the best aspects of this recipe is how quick it is to prepare. In fact, the actual mixing and molding process takes less than 30 minutes. Therefore, you can easily fit this project into a busy schedule. Meanwhile, the drying time requires no effort on your part.
Customizable
The customization options for these aroma stones are virtually endless. For instance, you can create seasonal scents like cinnamon and orange for fall or peppermint for winter. Additionally, you can add dried herbs or flower petals to the mixture for extra visual appeal. Furthermore, experimenting with different molds allows you to create stones that complement your home decor perfectly.
Crowd-Pleasing
These aroma stones make excellent gifts. In fact, everyone appreciates a thoughtful, handmade present. Moreover, they’re perfect for housewarming parties, teacher gifts, or holiday presents. Subsequently, you can package them in small organza bags with a custom label explaining the scent benefits. Consequently, your friends and family will be impressed by your creativity.
Print
DIY Aroma Stones: A Simple Way to Refresh Your Home
- Total Time: 24-48 hours
- Yield: Approximately 15-20 stones 1x
Description
These DIY aroma stones naturally freshen your home using simple ingredients. They gradually release essential oil scents for weeks and can be customized with different colors and fragrances.
Ingredients
- 2 cups baking soda
- 1 cup cornstarch
- 1 1/4 cups water
- Food coloring (amount varies based on desired intensity)
- 10–15 drops essential oils of your choice
Instructions
- In a large mixing bowl, combine baking soda and cornstarch, whisking until fully integrated.
- Gradually add water to the dry ingredients, stirring continuously until a thick paste forms (similar to wet sand consistency).
- Divide mixture if making multiple colors, then add food coloring drops to each portion and stir until evenly distributed.
- Add 10-15 drops of essential oils to the mixture and stir thoroughly to incorporate.
- Take small portions and shape into stones by hand, or press into silicone molds for defined shapes.
- Place formed stones on wax paper or a drying rack.
- Allow to dry completely for 24-48 hours, depending on size and humidity.
- Once fully hardened, place stones around your home to enjoy their aromatherapy benefits.
Notes
- For stronger scent, add more essential oils.
- Stones can be rejuvenated by adding a few more drops of essential oil when the scent begins to fade.
- Store unused stones in airtight containers to preserve their fragrance.
- Research pet-safe essential oils if you have animals in your home.
- Prep Time: 20 minutes
FAQs
How long do aroma stones last?
Generally, aroma stones last anywhere from 2-3 months, depending on the environment. However, when the scent begins to fade, you can rejuvenate them by adding a few more drops of essential oil. Therefore, they can continue providing beautiful aromas for even longer periods.
Can I use aroma stones in humid areas like bathrooms?
Yes, you can use aroma stones in bathrooms. Nevertheless, they might dissolve faster in very humid environments. Consequently, placing them in a dish rather than directly on wet surfaces is recommended. Meanwhile, their scent can help combat bathroom odors naturally.
Are aroma stones safe around pets?
While the stones themselves are non-toxic, some essential oils can be harmful to pets, especially cats. Therefore, research pet-safe essential oils before making stones for homes with animals. Alternatively, keep the stones in areas your pets cannot access.
Can children help make these?
Absolutely! This is a wonderful project for children. However, adult supervision is necessary, especially when handling essential oils. Meanwhile, kids will love creating their own colors and shapes. Consequently, this becomes both a craft activity and a science lesson.