
Introduction to Cake Pops
Ah, cake pop recipe! These delightful treats combine the joy of cake with the convenience of a lollipop. Their bite-sized form and decorative possibilities make them perfect for any occasion. But have you ever wondered about their origins and what makes them so popular?
A Sweet Invention
The journey of the cake pop is a story of creativity. Originally designed to use up leftover cake, they have become a dessert phenomenon. This transition from humble beginnings to culinary staple is nothing short of remarkable.
The Basics of Cake Pop Making
Creating cake pops is, at its heart, a simple process. First, you crumble cake and mix it with frosting. Then, you roll this mixture into balls, attach them to lollipop sticks, and dip them in melted chocolate or candy coatings. Sounds straightforward, right? Yet, the true art lies in mastering the details, like achieving a perfectly smooth coating and ensuring the cake balls are firm yet moist.
Fear not, though! With a bit of patience and creativity, you’ll soon be crafting homemade cake pops that could steal the show at any gathering. Whether you’re an experienced baker or trying your hand at this for the first time, this guide is here to walk you through each step. We promise to equip you with all you need to make flawless cake pops.
In the chapters to come, we’ll dive into basic recipes, uncover advanced decorating techniques, confront common pitfalls, and much more. So, let’s set off on this sweet adventure together, ready to explore the world of cake pops with excitement and anticipation.
Basic Cake Pop Recipe
Roll up your sleeves because we’re diving into the basic cake pop recipe! This is where the magic begins, transforming ordinary cake into delightful, bite-sized treats. Let’s break down the process into manageable steps, ensuring you can follow along, regardless of your baking prowess.
The Foundation: The Cake
First things first, you’ll need a cake. You can either bake one from scratch or use a boxed mix – the choice is yours. The key here is to have a cake that’s moist enough to hold its shape when crumbled and mixed with frosting but not so moist that it becomes gooey or fails to stay on the stick.
Binding Together: The Frosting
Once your cake is cooled and crumbled to the texture of fine breadcrumbs, the next step is to add frosting. This acts as a glue, holding the cake crumbs together. A good rule of thumb is to start with a small amount and gradually add more until you achieve a moldable consistency.
Shaping and Chilling: Forming the Balls
After mixing your cake and frosting to the right consistency, it’s time to roll the mixture into balls. This is where you can play with size, but keeping them uniform ensures even coating and cooking times. Once rolled, these balls need to chill in the fridge or freezer until they’re firm. This step is crucial for making sure they stay on the stick during the dipping process.
The Grand Dip: Coating Your Cake Pops
The final flourish is dipping your cake pops into melted chocolate or candy melts. This step not only adds an extra layer of flavor but also seals in the moisture of the cake. You can melt your choice of coating in a microwave or using a double boiler. Adding a touch of oil can help achieve a smoother consistency.
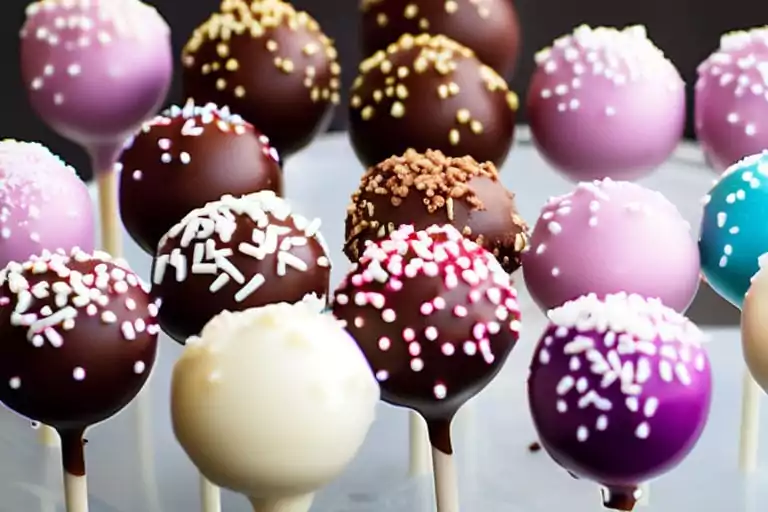
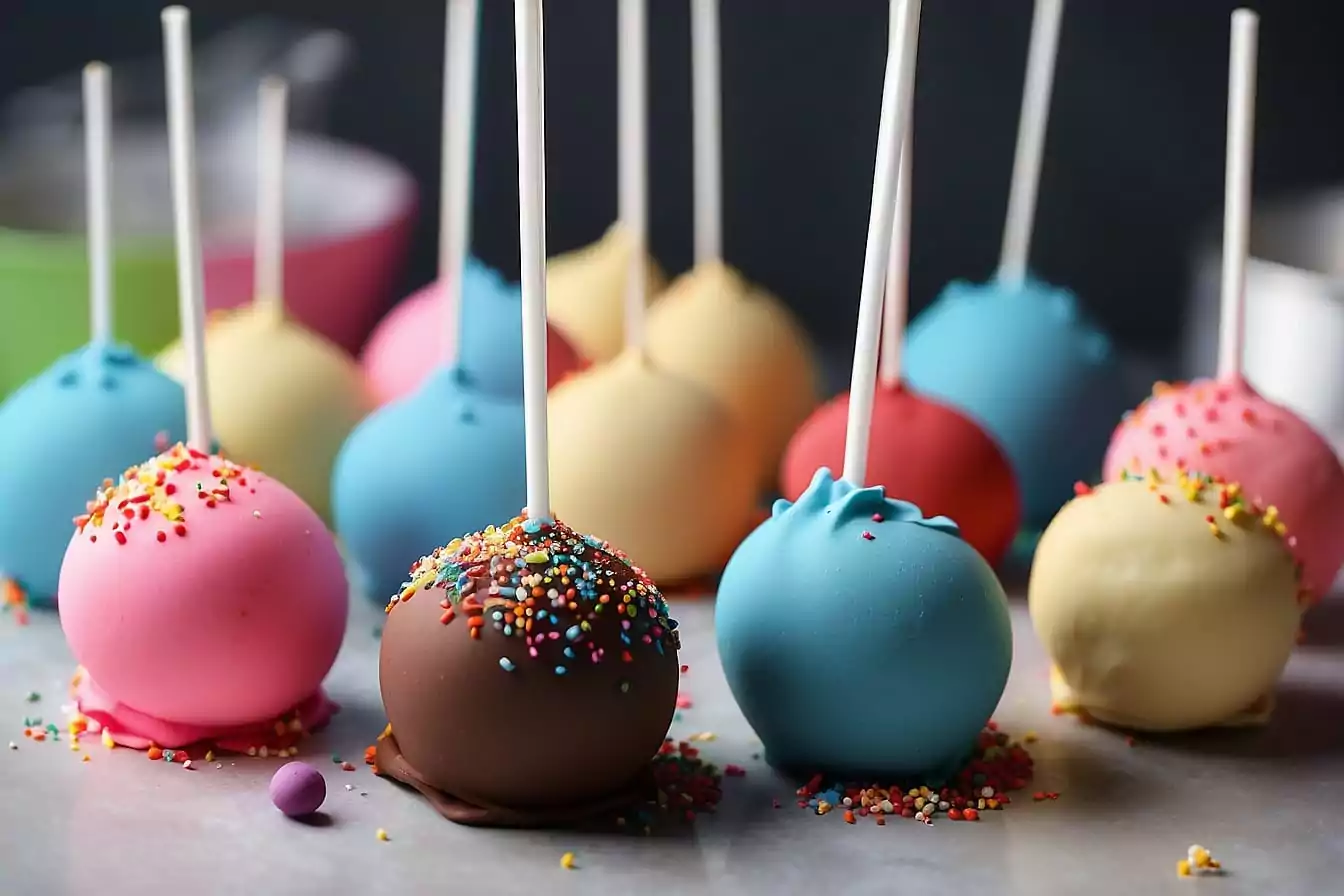
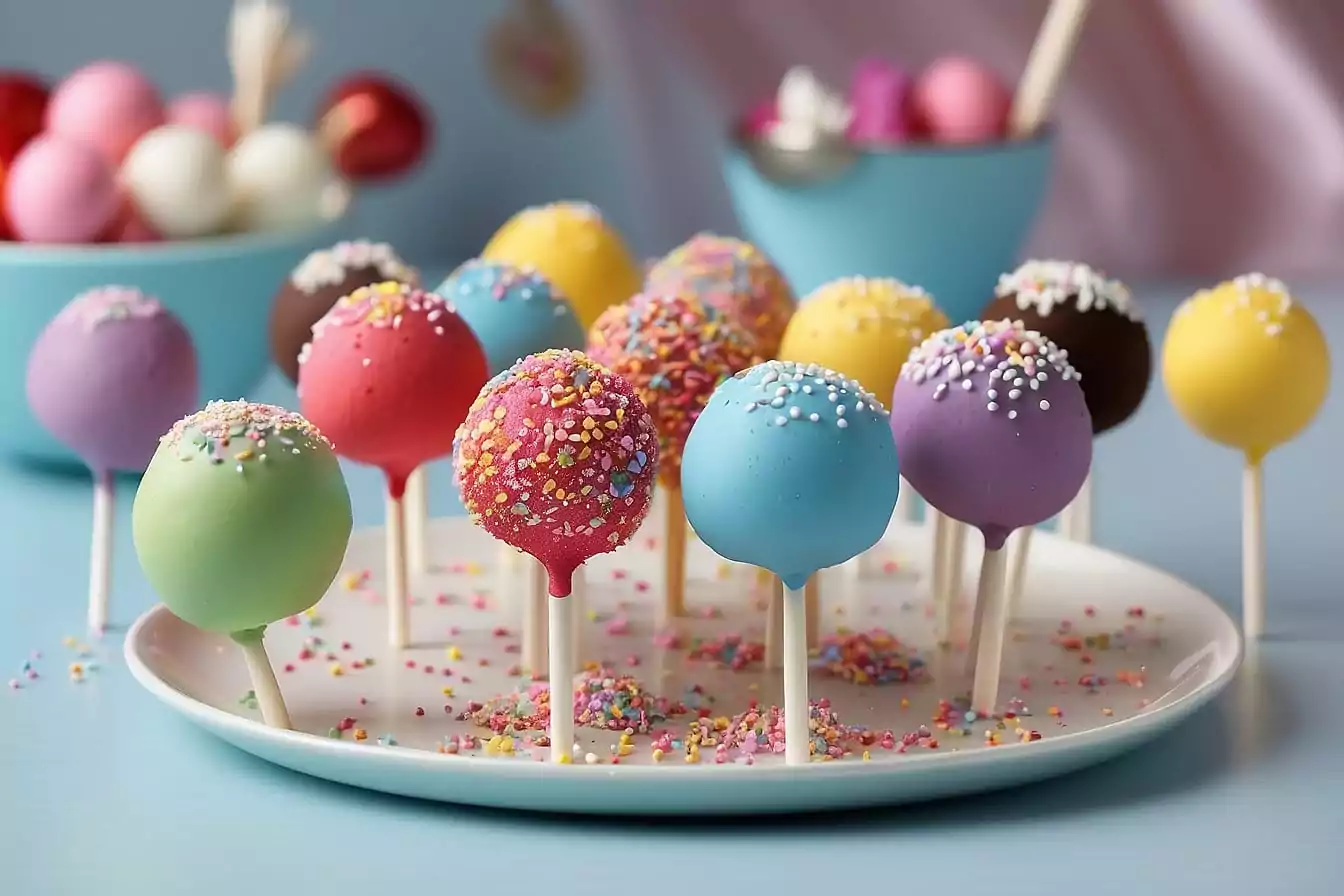
Decorating: Unleash Your Creativity
Once dipped, it’s time to decorate your cake pops. Here, the sky’s the limit! Sprinkles, crushed nuts, or a drizzle of a different colored coating can add that wow factor to your treats. Let them dry upright in a Styrofoam block or cake pop stand, and voilà, your cake pops are ready to impress.
Remember, practice makes perfect. Each batch of cake pops is an opportunity to refine your technique and explore new flavor combinations and decorations. So, don’t be afraid to experiment and most importantly, have fun with it!
Advanced Techniques and Variations
Advanced Techniques
Achieving the Perfect Dip To get a smooth, even coat on your cake pops, temperature and consistency are key. Melt your chocolate or candy melts gently, using a double boiler or microwave, ensuring it’s not too thick. A touch of vegetable oil can help thin out chocolate for a flawless dip. Dip your cake pop straight in, then tap off any excess for that smooth finish.
Color and Texture Experimenting with colored candy melts or adding texture to your chocolate before it sets can bring a new dimension to your cake pops. Consider using a toothpick to swirl different colors together on the pop or sprinkling on crushed nuts, mini chocolate chips, or edible glitter while the coating is still wet.
Variations
Flavor Combinations Don’t be afraid to mix and match cake and frosting flavors. A lemon cake mixed with raspberry frosting, covered in white chocolate, can offer a refreshing twist. Alternatively, a chocolate cake combined with orange-infused chocolate frosting offers a classic flavor profile with a sophisticated twist.
Theme-Specific Designs Tailor your cake pops to fit any theme or occasion, from holidays to birthdays. For Halloween, consider creating pumpkin-shaped cake pops with orange candy melts. For a more elegant event, a simple white chocolate dip with gold sprinkles or sugar pearls can add a touch of sophistication.
Dietary Adjustments Accommodating dietary preferences or restrictions doesn’t mean compromising on taste or presentation. Gluten-free flour blends and vegan cake and frosting options ensure everyone can enjoy these delightful treats. Remember, the key to great gluten-free or vegan cake pops is in finding the right balance of ingredients to ensure they hold together well and taste delicious.
In exploring these advanced techniques and variations, you’re not just making cake pops; you’re crafting edible art. Whether you’re aiming to impress at a party or just looking to try something new in the kitchen, these ideas provide a foundation for creativity and culinary exploration. The joy of cake pops lies in their versatility and the endless possibilities they offer for personalization and innovation.
Common Challenges and Solutions
Cracking Coating A common issue is the cake pop coating cracking after dipping. This often happens due to temperature differences between the cake ball and the coating. To prevent this, make sure your cake balls are not too cold when you dip them in the melted chocolate. Letting them sit at room temperature for a bit before dipping can help. Additionally, avoid overheating your coating material, as extremely hot chocolate can also cause cracks as it cools and contracts.
Cake Pops Falling Off Sticks If cake pops fall off their sticks, it might be because the mixture isn’t sticky enough or the sticks aren’t inserted properly. To fix this, ensure your cake-to-frosting ratio allows for a moist mixture that holds together well. Dipping the stick in a little bit of melted chocolate before inserting it into the cake ball can also act as a “glue” to keep everything together.
Uneven Shapes For perfectly round cake pops, using a cookie scoop to portion out the mixture before rolling it into balls can ensure uniform size and shape. It’s also helpful to chill the rolled balls briefly before dipping; this firms them up and makes them easier to work with.
External Links for Further Exploration
- Tempering Chocolate for a Perfect Coating: Understanding how to temper chocolate can be a game-changer for achieving a smooth, shiny finish on your cake pops. The Ghirardelli Chocolate Company offers an excellent guide on How to Temper Chocolate that can help you master this technique.
- Creative Cake Pop Designs and Ideas: For those looking to dive deeper into cake pop design and decoration, Wilton provides a treasure trove of Cake Pop Decorating Ideas. From simple sprinkles to intricate themes, there’s something for everyone.
- Vegan and Gluten-Free Baking: For accommodating various dietary needs, Minimalist Baker is a fantastic resource. Their guide on Vegan and Gluten-Free Baking includes tips and recipes that can be easily adapted for cake pop creations.
By addressing these common challenges and exploring additional resources, you’ll be well-equipped to tackle any issues that arise in your cake pop-making endeavors. Remember, practice makes perfect, and every challenge is an opportunity to refine your skills and creativity in the kitchen.
Decorating Tips
Choosing Your Palette Select a color theme or palette that matches the occasion. For instance, pastel colors for a spring gathering or vibrant hues for a birthday party. Using colored candy melts is an easy way to add a pop of color to your cake pops.
Textures and Patterns Textures can add a visual and tactile element to your cake pops. After dipping your cake pops in the base coating, consider adding texture with toppings such as crushed nuts, coconut flakes, or crumbled cookies before the coating sets. For patterns, use a toothpick or a small piping bag to swirl or drizzle contrasting colors of melted chocolate over the base coat.
Themes and Characters For themed parties or special occasions, decorate your cake pops to match the theme. This could mean creating cake pops that look like popular characters for a child’s birthday party or elegant, glitter-dusted cake pops for a wedding. Use fondant, edible markers, and shaped sprinkles to bring these characters and themes to life.
External Links for Further Inspiration
- Wilton’s Cake Pop Decorating Guide: Wilton offers a comprehensive guide to decorating cake pops, including tips on achieving the perfect dip, as well as ideas for themed decorations that will inspire your next creation.
- Bakerella’s Creative Cake Pop Designs: Angie Dudley, also known as Bakerella, is the pioneer of cake pops. Her website features numerous creative cake pop designs, from simple to intricate, that can serve as a great source of inspiration.
- Craftsy’s Guide to Cake Pop Decoration: For those looking to perfect their decorating technique, Craftsy offers a variety of classes and articles, including tips on decorating cake pops. This resource is ideal for decorators looking to refine their skills and learn new techniques.
By harnessing these decorating tips and drawing inspiration from the wealth of resources available, you can elevate your cake pops to new heights of beauty and personalization. Decorating cake pops is an opportunity to experiment, learn, and, most importantly, have fun. Whether you’re aiming for elegance or whimsy, the final touch is what makes your cake pops uniquely yours.
Storing Cake Pops
For a Few Days Keep cake pops at room temperature if serving them within a day or two. Use an airtight container to keep them fresh. Store them away from sunlight and heat to prevent melting.
For Longer Storage Refrigerate cake pops in a sealed container for up to a week for longer freshness. To freeze, wrap each cake pop in plastic and place them in a freezer bag or container. They’ll last for about a month. Thaw them at room temperature before serving.
Serving Cake Pops
Showcasing Your Treats Use a cake pop stand or a Styrofoam block to display your cake pops. These tools not only make your treats look great but also make it easy for guests to grab them.
Creative Ideas Be creative with your presentation. Arrange them on a platter in fun patterns or shapes for parties. For a unique touch, create a cake pop bouquet by setting the sticks in a decorated foam base. Tailor your display to fit the event’s theme with matching colors and decorations.
By making these adjustments, we’ve streamlined our guide on storing and serving cake pops, keeping the sentences concise and the voice active. This approach not only makes the information more digestible but also more direct and engaging for the reader, ensuring they’re well-equipped to make their cake pop experience memorable.
Frequently Asked Questions (FAQs)
In this segment, we aim to tackle some of the most commonly asked questions about cake pops, providing clear, concise answers and solutions to help you perfect your baking craft.
How do I prevent my cake pops from falling apart? A: To ensure cake pops stay intact, achieve the right balance between cake and frosting. The mixture should be moist enough to hold together without being overly sticky. If it’s too dry, add a bit more frosting; if too moist, a little more cake crumb.
Can I make cake pops without a cake pop maker? A: Absolutely! You can crumble baked cake and mix it with frosting, then roll the mixture into balls. This method doesn’t require a cake pop maker and allows for a lot of customization.
Why do my cake pops crack after dipping them in chocolate? A: Cracking usually occurs due to temperature differences. Ensure the cake balls are not too cold before dipping into the melted chocolate. Let them adjust to room temperature for a short period after coming out of the fridge or freezer.
How long do cake pops last? A: When stored properly in an airtight container, cake pops can last at room temperature for a few days, in the refrigerator for up to a week, and in the freezer for about a month.
Can cake pops be made vegan or gluten-free? A: Yes, you can make vegan or gluten-free cake pops by using suitable cake and frosting alternatives. There are many recipes available that cater to these dietary requirements.
What’s the best way to melt chocolate for cake pops? A: Melting chocolate slowly in a double boiler or in short intervals in a microwave helps prevent overheating. Stirring frequently ensures a smooth consistency.
How can I add flavor to my cake pops? A: Incorporate different cake and frosting flavors, mix-ins like crushed cookies or nuts, or experiment with flavored extracts. The combinations are endless and allow for lots of creativity.
By addressing these FAQs, you provide valuable insights and tips that can help both novice and experienced bakers navigate the fun and sometimes challenging process of making cake pops. Remember, practice and experimentation are key to mastering this delightful treat.
Conclusion
We’ve traveled from the basics to the nuances of crafting cake pops, blending creativity with culinary skill. Cake pops are more than treats; they’re a canvas for your imagination and a way to spread joy. Each batch invites you to try new flavors and designs, turning every occasion into a special event.
For those keen to dive deeper into baking, our Ultimate Baking Guide for Beginners lays a solid foundation. And, our Creative Party Dessert Ideas article offers exciting ways to showcase your cake pops at gatherings.
Short and sweet, cake pops embody baking’s joy and creativity. They’re perfect for any celebration or a cozy night in. Our Guide to Dessert Pairings can help you match cake pops with other desserts for an unforgettable treat.
In this guide, we aimed to inspire you to explore, innovate, and most importantly, enjoy baking. Here’s to your next adventure in the kitchen. Happy baking!