
I’ve always loved experimenting with seafood, especially when I can bring in bold flavors from different cuisines. These Asian-Style Tuna Cakes with Spicy Mayo are one of my favorite go-to recipes when I need something quick, satisfying, and packed with flavor. I remember the first time I made them—it was a rainy evening, and I was craving something warm, crispy, and just a little spicy. I had some tuna in the pantry and decided to throw together a few ingredients that reminded me of my favorite Asian dishes. The result? Pure comfort food with a punch.
What I really enjoy about this recipe is how incredibly simple it is. You don’t need fancy ingredients or hours in the kitchen. Just a few pantry staples and some fresh aromatics, and you’re ready to go. The combination of soy sauce, green onions, garlic, and that touch of sriracha in the mayo adds layers of flavor that make each bite exciting. Plus, the crispy crust you get from pan-frying in avocado and sesame oil gives the tuna cakes a delightful texture without being too heavy.
These tuna cakes aren’t just delicious—they’re versatile too. I often serve them as an appetizer for dinner parties or as a main course with a light salad on the side. They’re also great for meal prep because they hold up well in the fridge and reheat beautifully. Whether you’re cooking for your family or hosting friends, these tuna cakes always get rave reviews.
So if you’re looking for a new twist on classic tuna patties, give this recipe a try. You’ll get the savory, crispy, spicy, and creamy all in one dish—and I promise, they won’t last long on the plate.
Ingredients
For the Tuna Cakes:
-
2 (142 g) cans flaked white tuna, drained
-
2 green onions, finely chopped (whites and greens separated)
-
1 egg
-
1 tbsp soy sauce
-
2 tbsp arrowroot powder (or regular flour)
-
¼ cup mayonnaise
-
2 cloves garlic, minced
-
Salt and pepper, to taste
-
½ cup gluten-free crumbs or panko crumbs
-
Avocado oil, for frying
-
Sesame oil, for frying
For the Spicy Mayo:
-
½ cup real mayonnaise
-
Juice from ½ lime
-
1 tbsp sriracha sauce
-
Salt and pepper, to taste
How to Bake (Pan-Fry) the Tuna Cakes
First, wash and finely chop the green onions. Separate the white parts from the greens, as you’ll use the whites in the tuna mixture and the greens for garnish. Set the chopped greens aside for later.
Pour the gluten-free or panko crumbs into a shallow bowl. These will be used to coat the tuna cakes, giving them a golden, crunchy exterior. Also, in a separate small bowl, whisk together the spicy mayo by mixing the mayonnaise, fresh lime juice, sriracha sauce, and a touch of salt and pepper. Stir until smooth and creamy. Once combined, set this aside in the fridge to chill.
Now, in a mixing bowl, combine the drained tuna with the whites of the green onions, one egg, soy sauce, arrowroot powder (or regular flour), ¼ cup of mayonnaise, minced garlic, and salt and pepper to taste. Using a fork, mix everything thoroughly until the ingredients are fully incorporated.
Shape the tuna mixture into small, firm cakes, each about 2 inches in diameter. Take your time forming them evenly so they hold their shape during frying. Once formed, gently coat each cake in the crumbs, pressing lightly to help them stick without breaking apart.
Next, heat a nonstick pan over medium heat. Add a small drizzle of avocado oil and a touch of sesame oil for flavor. When the oil is hot, place the tuna cakes in the pan. Fry each side for about 2 minutes or until they are golden brown and crisp on the outside while hot and soft inside.
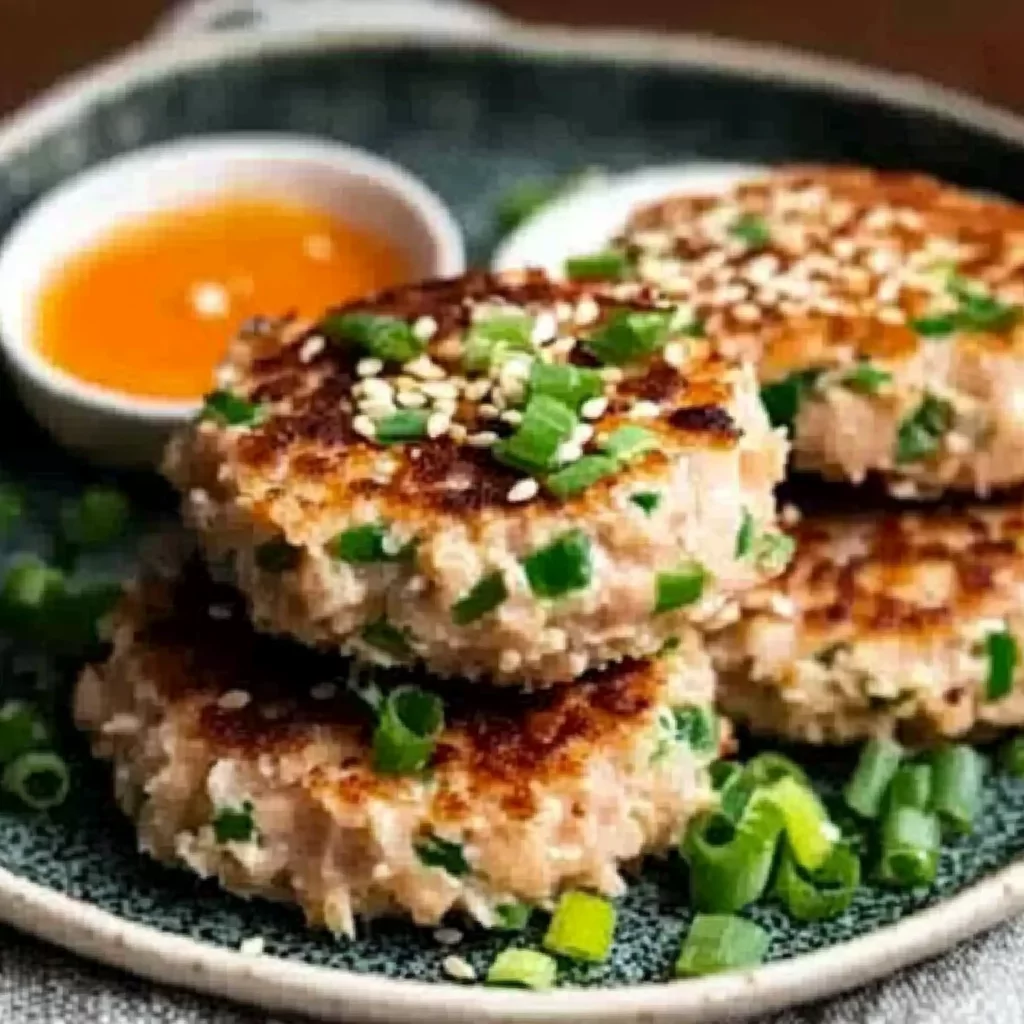
When they’re done, transfer the cooked tuna cakes to a plate lined with paper towels to absorb any excess oil. Serve the cakes warm, drizzled generously with the spicy mayo and garnished with sesame seeds and the reserved green onion greens for a fresh pop of color and flavor.
How Long to Cook the Tuna Cakes
When it comes to cooking these tuna cakes, timing is everything. Because the tuna is already cooked and canned, the goal is to bring the ingredients together and create a crispy outer layer while warming the inside. After shaping the mixture into small cakes, heat your nonstick pan to medium and let it warm for a minute or two. Add a light drizzle of avocado oil along with a bit of sesame oil for flavor. Once the oil shimmers, gently place the tuna cakes into the pan.
Each cake should be fried for about 2 minutes per side. This ensures that the crust becomes golden and crisp while the center stays moist and flavorful. Don’t overcrowd the pan—give the cakes space to breathe so they cook evenly. If you have to work in batches, keep the cooked ones warm by covering them lightly with foil.
Avoid turning them too soon. Let each side cook undisturbed before flipping. This not only creates a beautiful crust but also helps the cakes stay intact. A golden-brown color is your cue that it’s time to flip.
How to Store Leftovers
If you happen to have leftovers—which isn’t likely, given how good they are—storing them is simple. Let the tuna cakes cool to room temperature before transferring them into an airtight container. They’ll stay fresh in the refrigerator for up to 3 days.
For reheating, the best method is to place them in a skillet over low heat with just a touch of oil. This brings back the crispiness without drying them out. Alternatively, you can use an oven set at 300°F (150°C) for about 8–10 minutes. Avoid microwaving, as it can make them soggy.
Store the spicy mayo in a separate airtight container in the fridge. Stir before using again, and only drizzle once the cakes are hot and ready.
Tips for Perfect Tuna Cakes
Getting the texture just right can make or break this dish. For perfectly moist yet firm tuna cakes, make sure to drain the tuna well. Excess moisture can cause the cakes to fall apart. Also, finely chopping the green onion whites helps blend the flavor evenly throughout each bite without leaving stringy bits.
To ensure the cakes hold their shape, don’t skip the arrowroot powder or flour. It acts as a binder and adds to the crispiness. If you’re using gluten-free crumbs, make sure they’re fine and not too coarse; this will help with even browning during frying.
Another pro tip: After forming the cakes, let them rest for 5 minutes before frying. This short resting time allows the mixture to firm up slightly, making them easier to handle in the pan.
Finally, always fry over medium heat. Too high and they’ll burn before heating through. Too low and they’ll soak up oil. Medium is the sweet spot for that perfect golden crust with a tender center.
