
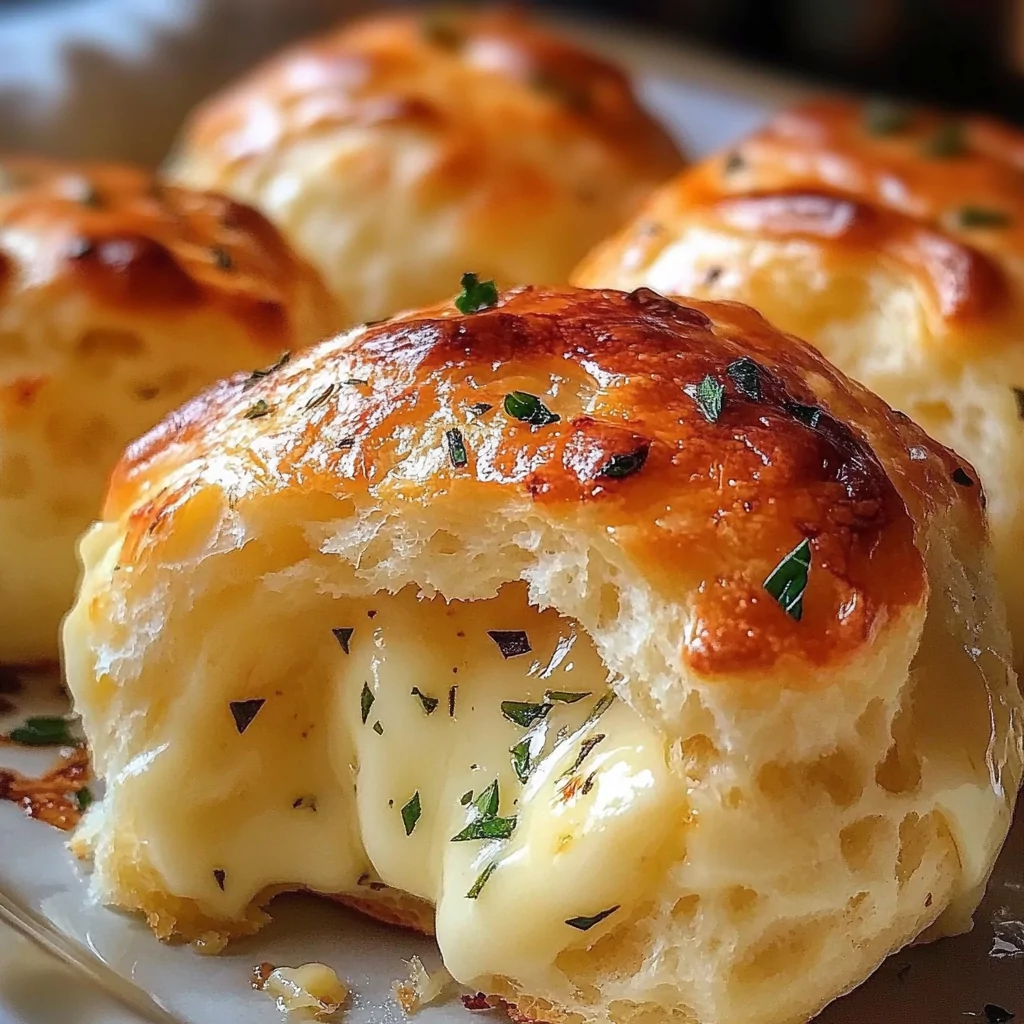
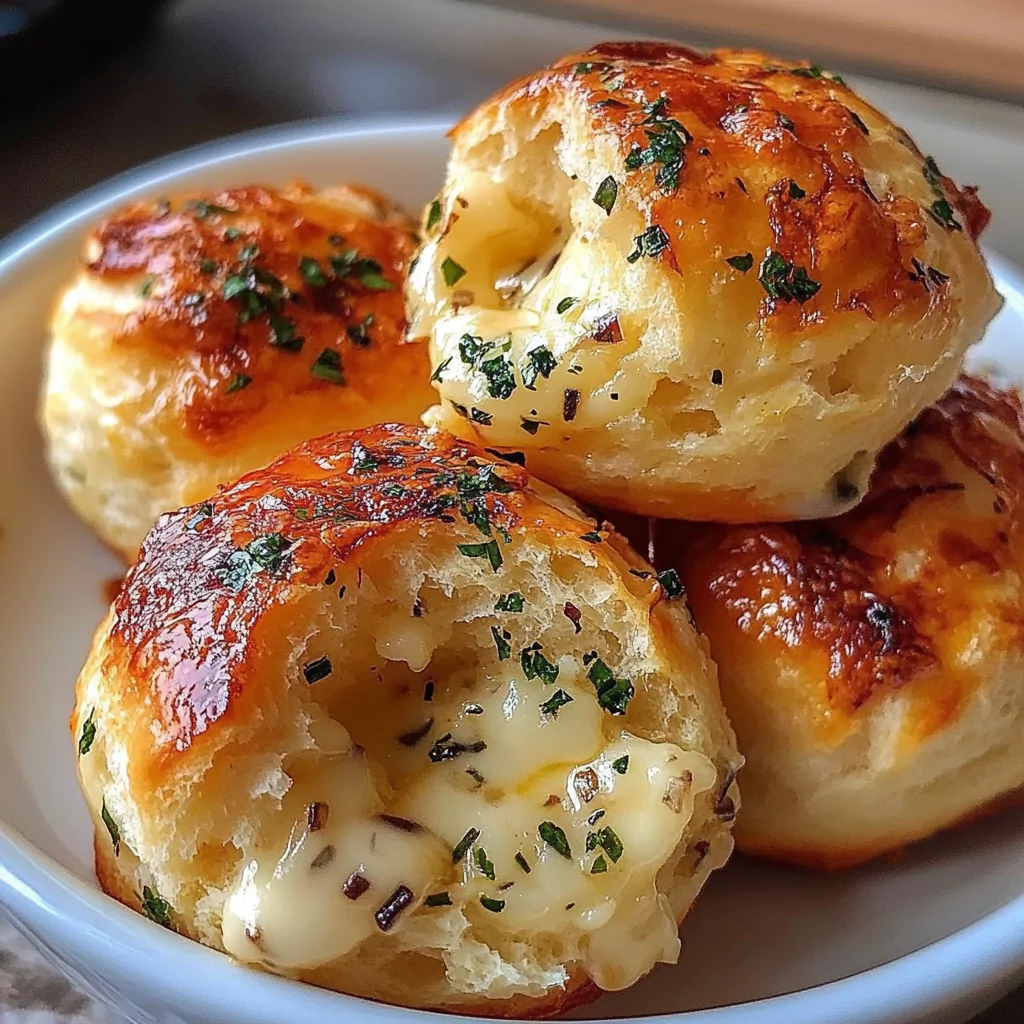
I love creating recipes that bring warmth and comfort to the table, and these Biscuit Garlic Butter Cheese Bombs are exactly that! They are soft, fluffy, and packed with gooey cheese, all wrapped in a golden, buttery, and garlicky biscuit. Whether you’re looking for an easy appetizer, a side dish, or a quick snack, these cheese bombs will satisfy every craving.
Irresistible Cheese-Filled Biscuits
Imagine biting into a warm, buttery biscuit, only to be met with a melty, cheesy center that stretches with every pull. These cheese bombs are not just delicious but also incredibly easy to make. Using store-bought biscuit dough, a few simple seasonings, and your favorite cheese, you can whip up a batch in no time.
The secret to their addictive flavor is the garlic butter coating, which infuses each biscuit with a rich, savory taste. Freshly minced garlic, melted butter, and a sprinkle of herbs take these simple cheese bombs to a whole new level.
The Perfect Snack or Side Dish
These Garlic Butter Cheese Bombs are great for any occasion. Serve them as an appetizer at a gathering, a side dish with soup, or simply enjoy them as a satisfying snack. The best part? They’re baked to golden perfection in just minutes, making them ideal for busy days when you need something quick yet absolutely delicious.
Get ready to impress your family and guests with these warm, cheesy delights! Soft, buttery, and oozing with cheese—these biscuit garlic butter cheese bombs will quickly become a household favorite.
Ingredients & How to Make Biscuit Garlic Butter Cheese Bombs
Ingredients for Biscuit Garlic Butter Cheese Bombs
To make these irresistible garlic butter cheese bombs, you’ll need just a few simple ingredients. Each one plays a crucial role in delivering the perfect balance of flavor and texture.
- Refrigerated Biscuit Dough – Store-bought biscuit dough makes this recipe incredibly easy and convenient. You can use flaky or buttermilk-style biscuits.
- Cheese – Choose a cheese that melts well, such as mozzarella, cheddar, or gouda. Cut it into cubes for easy stuffing.
- Butter – Melted butter gives these bombs their rich, buttery flavor.
- Garlic – Freshly minced garlic infuses the butter with a deep, savory aroma. You can also use garlic powder for a milder taste.
- Parsley – Fresh or dried parsley adds a pop of color and enhances the garlic butter with a light, herby flavor.
- Salt – A pinch of salt helps to bring out all the flavors.
- Optional Toppings – You can sprinkle grated Parmesan or a dash of Italian seasoning for extra flavor.
How to Make Biscuit Garlic Butter Cheese Bombs
Making these cheese-filled biscuits is quick and easy! Follow these simple steps for a golden, cheesy, and garlicky treat.
Step 1: Preheat the Oven
Preheat your oven to 375°F (190°C). Line a baking sheet with parchment paper or lightly grease it to prevent sticking.
Step 2: Prepare the Biscuits
Open the refrigerated biscuit dough and separate the biscuits. Flatten each biscuit slightly using your hands or a rolling pin to create a larger surface for stuffing.
Step 3: Add the Cheese Filling
Place a cheese cube in the center of each flattened biscuit. Carefully fold the dough over the cheese and pinch the edges tightly to seal, forming a small ball. Ensure there are no openings so the cheese doesn’t leak out during baking.
Step 4: Arrange on Baking Sheet
Place each cheese-filled biscuit seam-side down on the prepared baking sheet, leaving some space between them to allow for expansion.
Step 5: Make the Garlic Butter
In a small bowl, melt the butter and mix in the minced garlic, parsley, and a pinch of salt. Stir well to combine.
Step 6: Brush with Garlic Butter
Using a pastry brush, generously coat the tops of each biscuit with the garlic butter mixture. This will give them a golden, flavorful crust as they bake.
Step 7: Bake to Perfection
Bake in the preheated oven for 12-15 minutes, or until the biscuits are golden brown and puffed up. Keep an eye on them to prevent over-browning.
Step 8: Add Final Touches & Serve
Once out of the oven, brush with any remaining garlic butter for extra flavor. Optionally, sprinkle with grated Parmesan or more parsley for a beautiful finish.
Serve warm and enjoy the cheesy, buttery goodness!
How Long to Bake Biscuit Garlic Butter Cheese Bombs
The baking time for Biscuit Garlic Butter Cheese Bombs depends on the size of your biscuits and the type of cheese you use. The goal is to achieve a golden brown, puffy exterior with a perfectly melted cheese center.
Here’s a general guide:
- Small biscuits – 10-12 minutes at 375°F (190°C)
- Medium biscuits – 12-15 minutes
- Large biscuits – 15-18 minutes
Check for doneness by looking for a golden brown crust. If needed, gently tap the biscuits; they should feel firm but still soft inside. If unsure, insert a toothpick near the seam—if it comes out clean and the cheese inside is melty, they’re done!
How to Store Leftovers
If you have leftover cheese bombs (which is rare because they disappear fast!), here’s how to store them properly to maintain their delicious texture and flavor.
Refrigerator Storage
- Place leftover biscuit cheese bombs in an airtight container.
- Store in the fridge for up to 3 days.
- Reheat in an oven at 300°F (150°C) for 5-7 minutes to keep them warm and crispy. Avoid microwaving, as it can make them soggy.
Freezer Storage
- Allow cheese bombs to cool completely before freezing.
- Wrap them individually in plastic wrap or place them in a freezer-safe bag.
- Store for up to 1 month.
- To reheat, bake at 325°F (165°C) for about 10 minutes until warmed through.
Tips for Perfect Biscuit Garlic Butter Cheese Bombs
For the best results, follow these pro tips to ensure your cheese bombs turn out fluffy, cheesy, and full of flavor every time.
1. Seal the Dough Well
Ensure the biscuit dough is pinched and sealed tightly around the cheese to prevent cheese leakage while baking.
2. Use High-Quality Cheese
Choose a melty cheese like mozzarella, cheddar, or gouda for that irresistible cheese pull. Avoid hard cheeses that don’t melt as easily.
3. Don’t Overbake
Watch your biscuits closely—overbaking can make them too dry. Remove them as soon as they turn golden brown.
4. Add Extra Flavor
For even more flavor, sprinkle Parmesan, Italian seasoning, or chili flakes on top before baking. You can also mix a little garlic powder into the biscuit dough for an extra garlicky taste.
5. Serve Immediately
Biscuit Garlic Butter Cheese Bombs taste best when served warm right out of the oven. This ensures you get the perfect combination of a crisp exterior and a gooey, melty cheese center.
Print
Biscuit Garlic Butter Cheese Bombs
- Total Time: 0 hours
- Yield: 8 cheese bombs 1x
Description
These Biscuit Garlic Butter Cheese Bombs are a warm, cheesy, and buttery delight! Made with flaky biscuit dough, melted cheese, and a rich garlic butter topping, they are perfect as an appetizer, snack, or side dish. Quick and easy to prepare, these cheese bombs will be a hit at any gathering!
Ingredients
- 1 can refrigerated biscuit dough
- 8 small cubes of cheese (mozzarella, cheddar, or gouda)
- 3 tbsp butter, melted
- 2 cloves garlic, minced
- 1 tbsp fresh parsley (or 1 tsp dried parsley)
- ½ tsp salt
- Optional: 2 tbsp grated Parmesan (for topping)
Instructions
- Preheat oven to 375°F (190°C). Line a baking sheet with parchment paper.
- Open the biscuit dough and separate the biscuits. Flatten each biscuit slightly.
- Place a cheese cube in the center of each biscuit. Fold the dough over the cheese and pinch the edges tightly to seal, forming a ball.
- Arrange the sealed biscuits seam-side down on the prepared baking sheet.
- In a small bowl, mix melted butter, garlic, parsley, and salt. Brush over each biscuit.
- Bake for 12-15 minutes, or until golden brown and puffed up.
- Brush with any remaining garlic butter and sprinkle with Parmesan if desired.
- Serve warm and enjoy!
Notes
- Use mozzarella for a gooey cheese pull, or cheddar for a sharper flavor.
- To reheat, place in the oven at 300°F (150°C) for 5-7 minutes to maintain crispiness.
- For an air fryer version, cook at 350°F (175°C) for 8-10 minutes.
- Add a sprinkle of red pepper flakes for a spicy kick.
- Prep Time: 10 minutes
- Cook Time: 12-15 minutes
Frequently Asked Questions
1. Can I Use Homemade Biscuit Dough Instead of Store-Bought?
Yes! If you prefer to make these cheese bombs from scratch, you can use homemade biscuit dough instead of refrigerated dough. A simple buttermilk biscuit dough works perfectly. Just ensure you roll out the dough evenly and cut it into portions large enough to wrap around the cheese.
2. What’s the Best Cheese to Use for Cheese Bombs?
The best cheeses are those that melt well and create a gooey center. Some great options include:
- Mozzarella – For the ultimate cheese pull.
- Cheddar – Adds a sharp, tangy flavor.
- Gouda – Smooth and creamy when melted.
- Monterey Jack – Mild and extra melty.
If you like stronger flavors, you can mix different cheeses or even add a little Parmesan on top for extra richness.
3. How Do I Keep the Cheese from Leaking Out?
The key to preventing cheese from oozing out is to seal the dough tightly around the cheese. Here are some tips:
- Press the edges of the dough together firmly.
- Roll the dough ball gently between your hands to ensure it’s fully sealed.
- Place the seam side down on the baking sheet to keep everything enclosed.
- Avoid overfilling with cheese—use small cubes rather than large chunks.
4. Can I Make These in an Air Fryer?
Yes! Air frying is a great option if you want crispy cheese bombs without turning on the oven.
- Preheat the air fryer to 350°F (175°C).
- Arrange the cheese bombs in a single layer in the air fryer basket, leaving some space between them.
- Cook for 8-10 minutes, shaking the basket halfway through for even browning.
- Brush with extra garlic butter after air frying for even more flavor!